Exoscale
These instructions walk through importing a Flatcar Container Linux image and launching an instance on Exoscale using either the Exoscale Console (Web UI) or the Exoscale CLI .
Exoscale CLI (optional)
Installing the
Exoscale CLI
(exo) is optional; all setup steps can also be completed entirely through the
Exoscale Console (Web UI)
.
To use the CLI, follow the official installation and configuration guide .
Security groups
All Exoscale instances block inbound traffic by default. In this example we configure inbound SSH (TCP port 22) for IPv4 (0.0.0.0/0) and IPv6 (::/0) on the
security group
, though the ports to open depend on your application.
In the Exoscale Console, navigate to Compute > Security Groups, select the default security group, and click Add Rule > SSH to allow inbound TCP port 22 for IPv4 (0.0.0.0/0) and IPv6 (::/0):
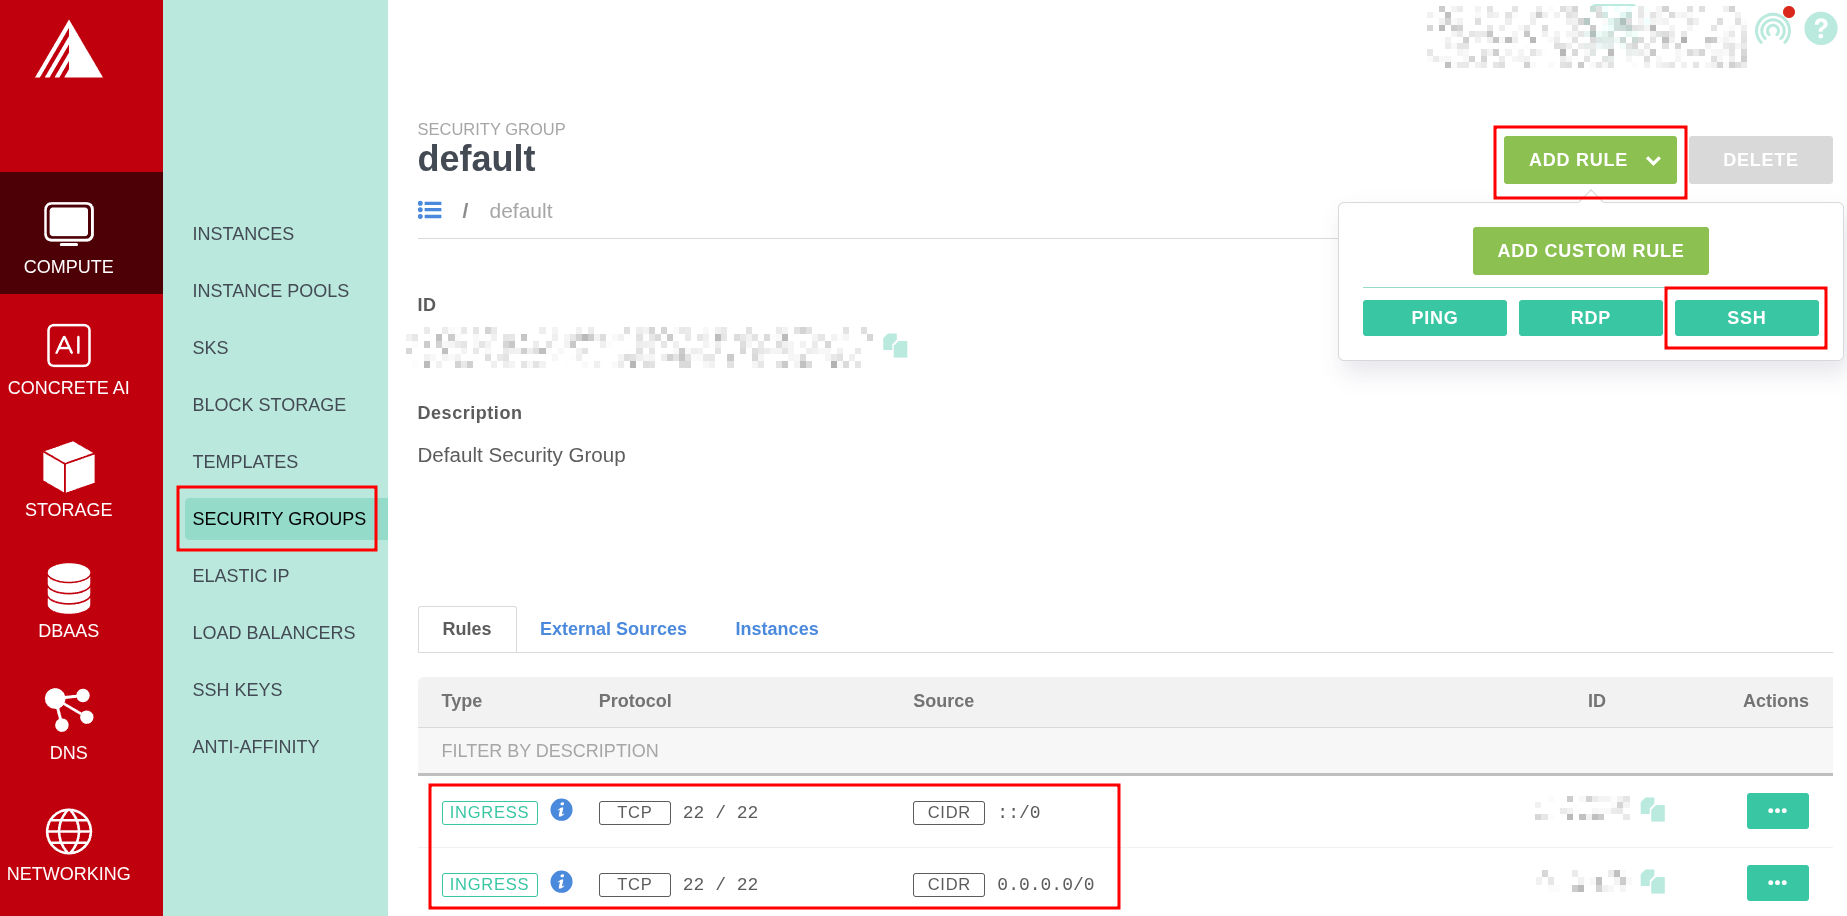
Add rules to the default security group to allow SSH over IPv4 and IPv6:
exo compute security-group rule add default --network 0.0.0.0/0 --port 22
exo compute security-group rule add default --network ::/0 --port 22
SSH keys (optional)
You can authorize SSH keys for the core user either through your
Butane Config
or by registering an
SSH keypair in Exoscale
. When an Exoscale SSH key is attached to an instance at creation time, the Flatcar Exoscale
OEM system extension
(
exoscale-ssh-key.service
) automatically fetches the public key from the Exoscale metadata service on boot and adds it to the core user.
In the Exoscale Console, navigate to Compute > SSH Keys, click Import, enter a Name (for example, my-ssh-key), paste your SSH Public Key, and click Import:
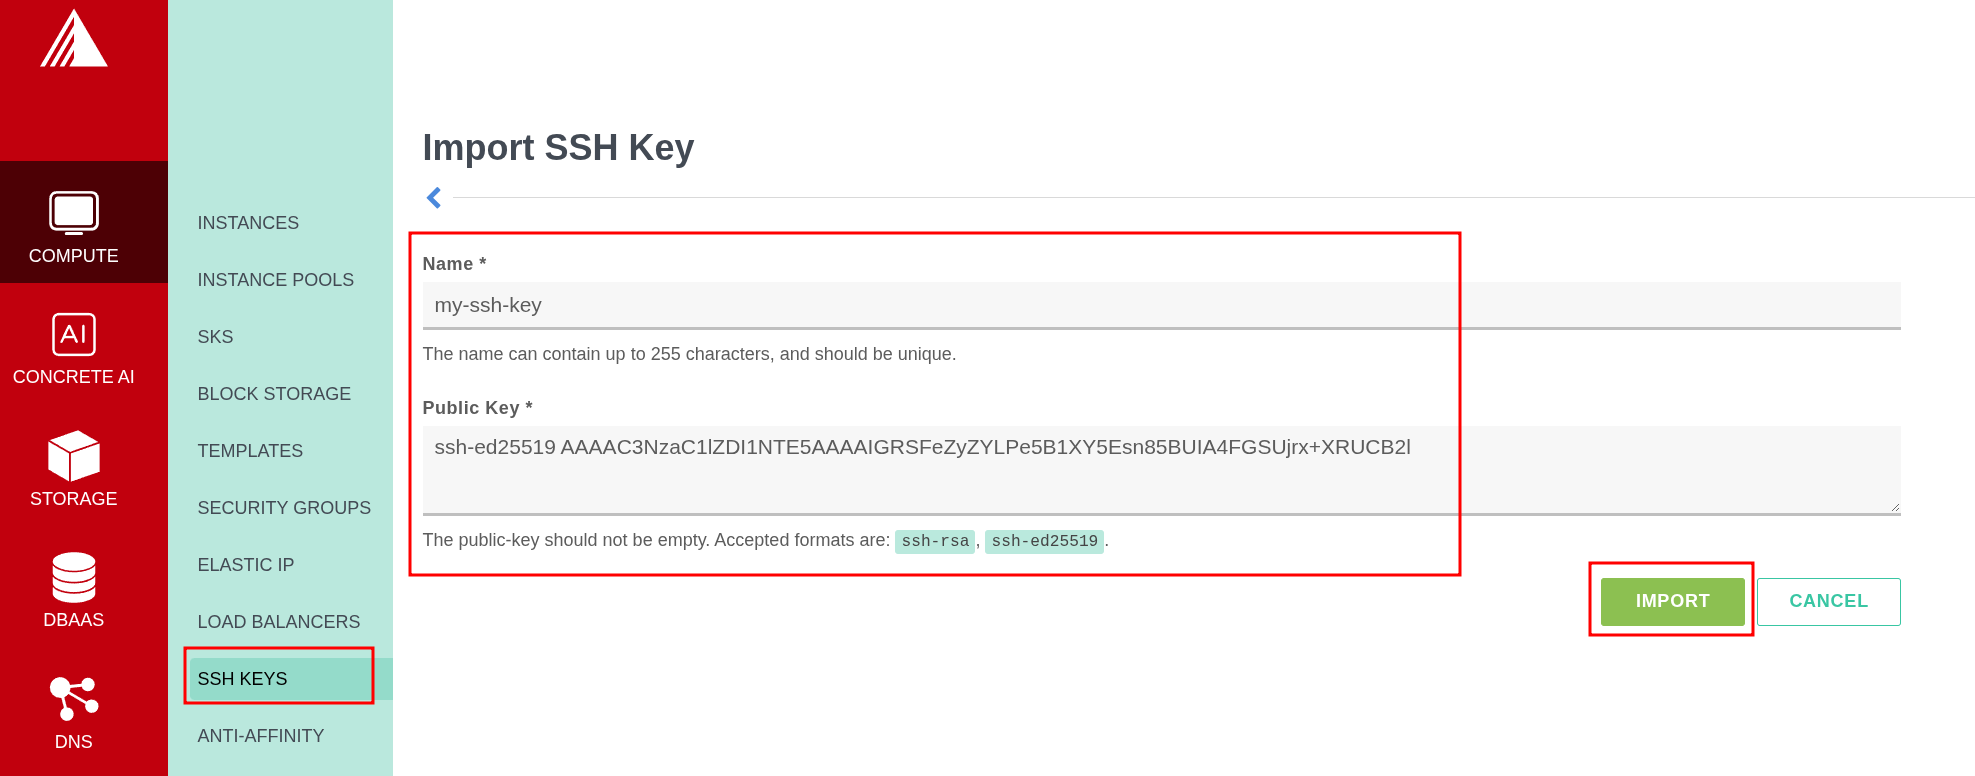
Register your SSH public key with the CLI:
exo compute ssh-key register my-ssh-key ~/.ssh/id_ed25519.pubCustom templates
Flatcar Container Linux is not currently one of the official templates provided by Exoscale (tracked in
flatcar/Flatcar#2164
), so you must first register the Flatcar Exoscale .qcow2 image for your desired
release channel
(stable, beta, alpha, or lts) as an
Exoscale Custom Template
.
For the Stable channel, the image URL and MD5 checksum file are:
- Image URL:
https://stable.release.flatcar-linux.net/amd64-usr/current/flatcar_production_exoscale_image.qcow2 - Checksums:
https://stable.release.flatcar-linux.net/amd64-usr/current/flatcar_production_exoscale_image.qcow2.DIGESTS
Note: Custom templates are zone-specific; the template’s zone must match the zone where you intend to deploy your compute instances.
Note: Keep SSH enabled on the custom template with the default username set to
coreif you plan to attach Exoscale SSH keys when creating instances, or disable it if you only configure SSH keys through Ignition.
Important: Running instances update automatically , but newly created instances will start from the image version registered in the custom template. If you regularly provision new instances, update your custom template as new releases are published.
- Navigate to Compute > Templates and click Add.
- Select your target Zone and enter a Name (for example,
Flatcar Stable). - Enter the Source URL and the MD5 Checksum from the
.DIGESTSfile. - Keep Enable SSH enabled with Login Username set to
core(or disable Enable SSH if only using Ignition for SSH keys), disable Enable Password, set Boot mode to UEFI, and click Add.
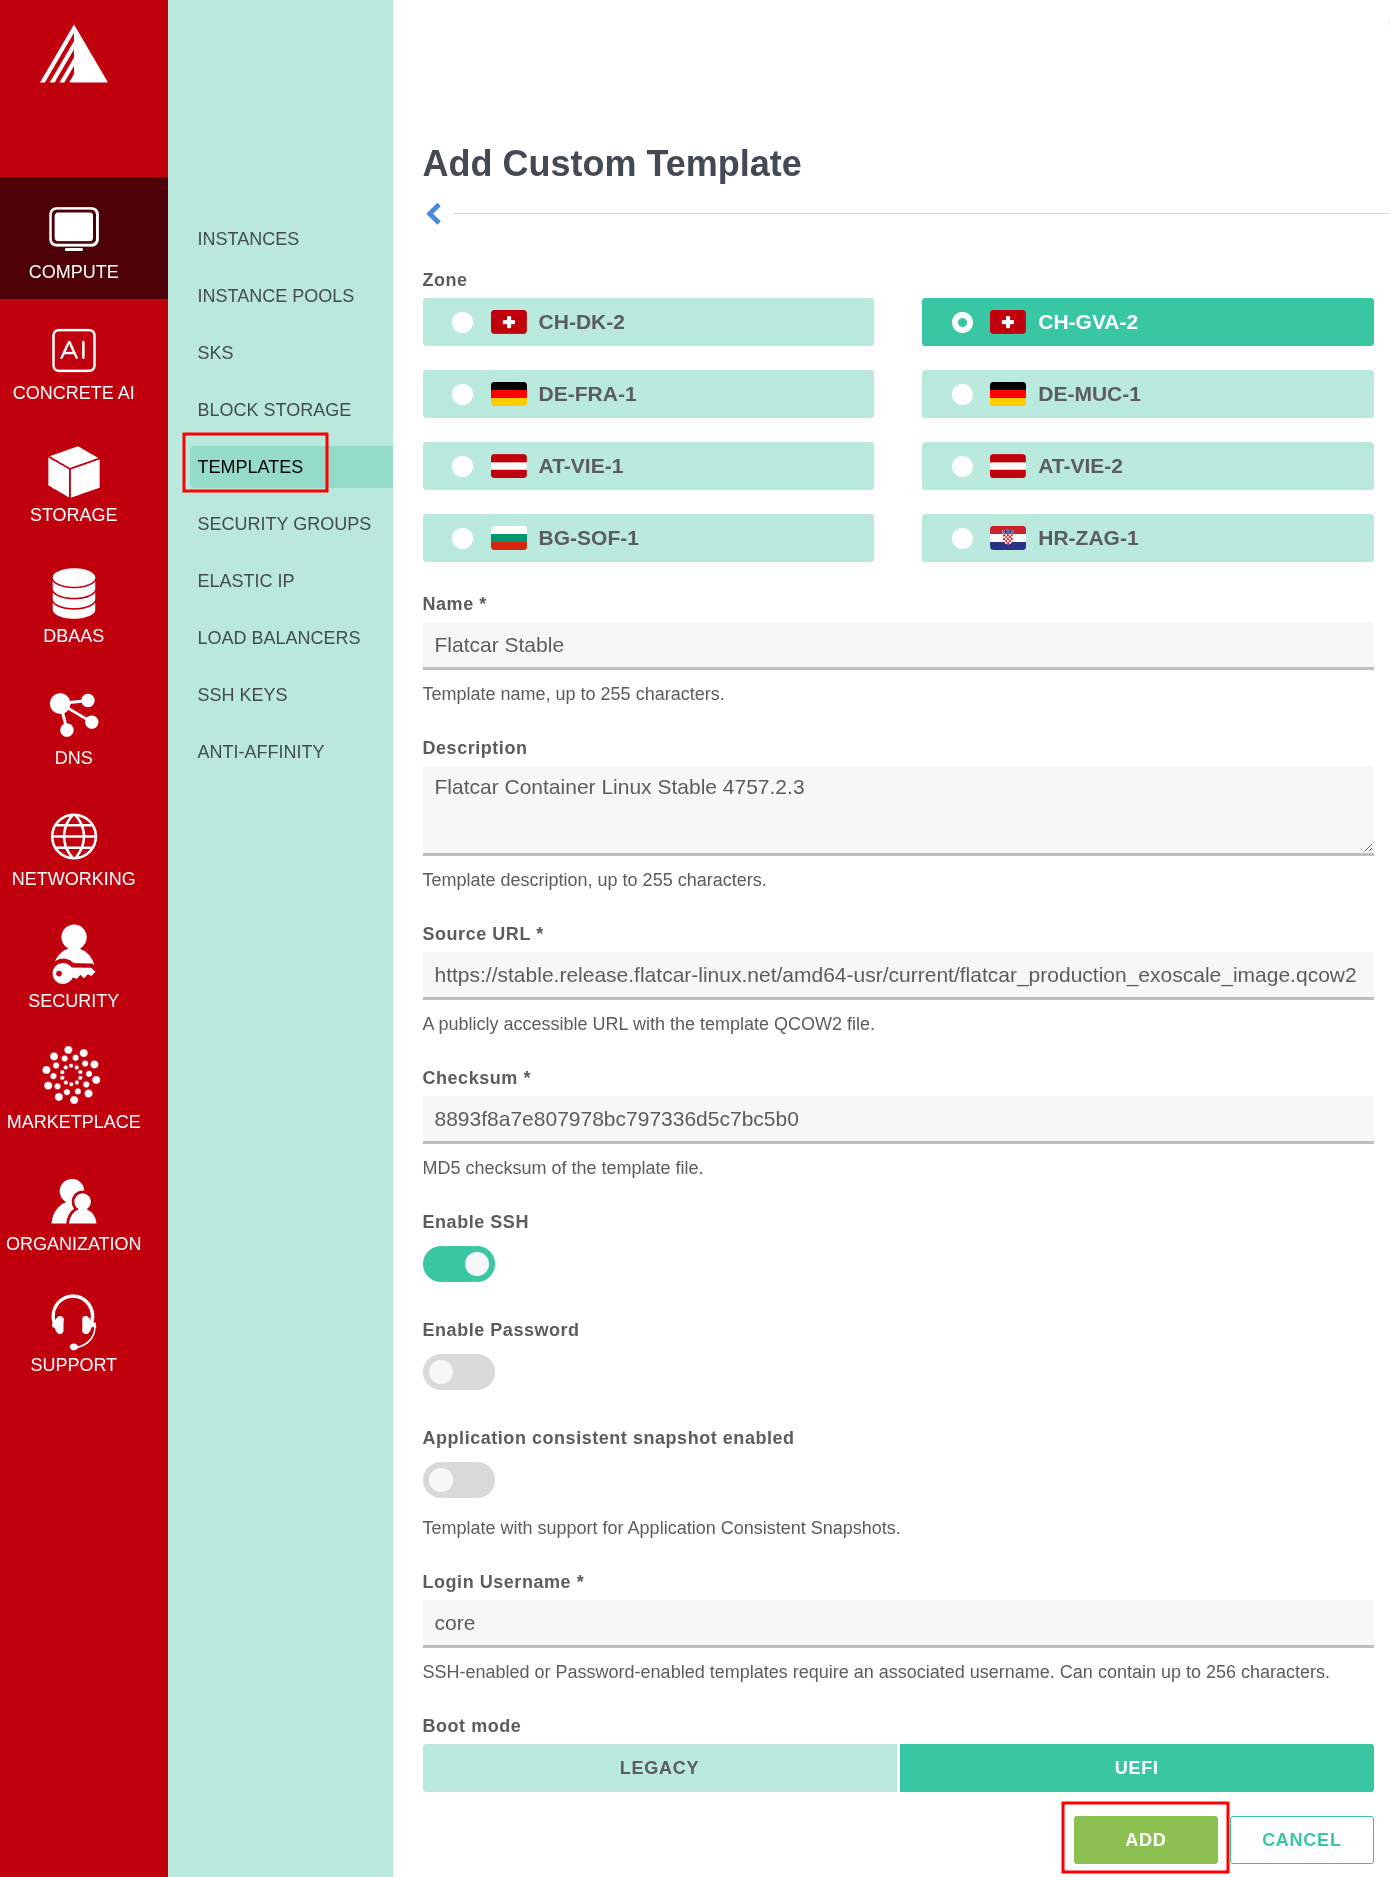
Fetch the MD5 checksum for the Stable channel image and register the custom template:
ZONE=ch-gva-2 # Set to your target Exoscale zone
IMAGE_URL="https://stable.release.flatcar-linux.net/amd64-usr/current/flatcar_production_exoscale_image.qcow2"
MD5_SUM=$(curl -sL "${IMAGE_URL}.DIGESTS" | awk '/# MD5 HASH/{getline; print $1}')

exo compute instance-template register \
  "Flatcar Stable" \
  "${IMAGE_URL}" \
  "${MD5_SUM}" \
  --zone "${ZONE}" \
  --username core \
  --disable-password \
  --boot-mode uefi
Butane Config
Flatcar Container Linux is configured on first boot using Ignition . Write a human-readable Butane Config and transpile it into an Ignition JSON file to pass as instance user data.
Note: If you registered an SSH key in Exoscale and do not need any additional first-boot configuration, you can skip this section and leave the instance User Data empty.
Create a minimal config.bu file that authorizes your SSH public key for the default core user:
variant: flatcar
version: 1.0.0
passwd:
  users:
    - name: core
      # Optional if the instance is created with an Exoscale SSH key,
      # as it will be fetched from the metadata service on boot.
      ssh_authorized_keys:
        - ssh-ed25519 AAAAC3...
# Additional configuration (such as storage or systemd units for containers) goes here:
# storage:
#   files: ...
# systemd:
#   units: ...
Transpile config.bu to an Ignition configuration (config.ign):
docker run --interactive --rm quay.io/coreos/butane:release \
  --pretty --strict < config.bu > config.ign
Launching an instance
Create a new compute instance from the custom template and provide config.ign as the user data. In this example we will launch a micro instance with a 10 GiB disk.
-
Navigate to Compute > Instances and click Add.
-
Enter a Name (for example,
hello-world), select the Custom Templates tab under Template, and choose your Flatcar template: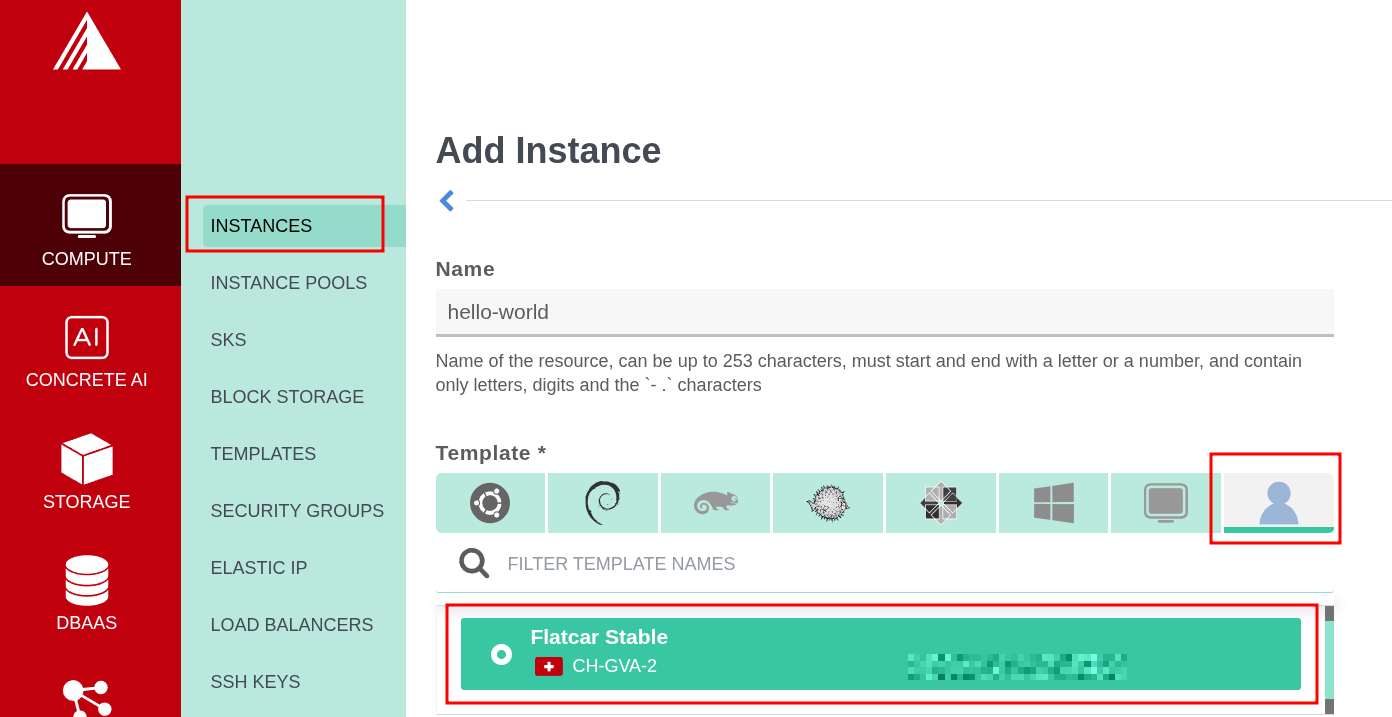
-
Select the Zone matching your custom template, choose the Standard - Micro instance type, and set Disk Size to
10 GiB. -
Under SSH Keys, select the SSH key you imported earlier (for example,
my-ssh-key), or check Do not use SSH keypairs if configuring SSH keys only through Ignition:
-
Paste the contents of
config.igninto the User Data field (leave empty if you skipped creating an Ignition configuration):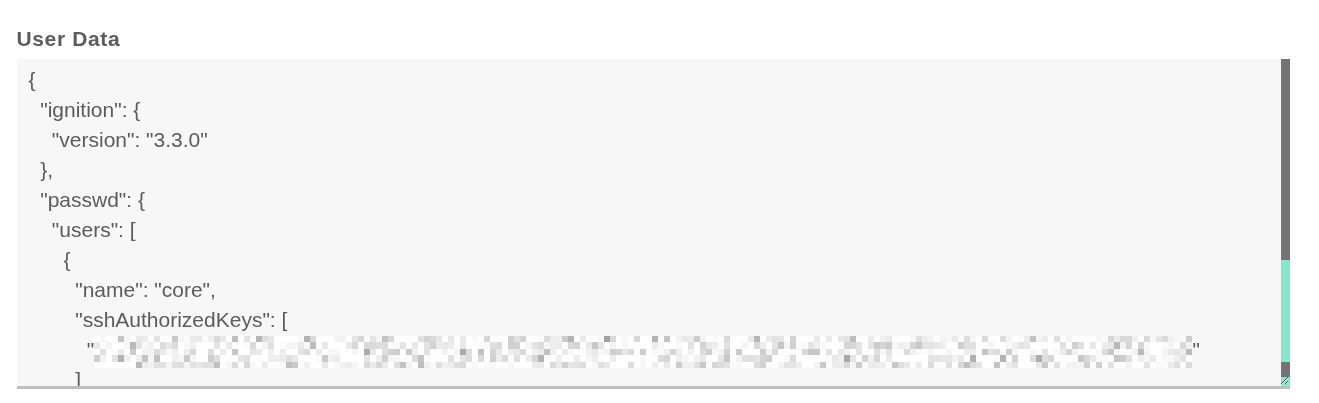
-
Review the instance settings and click Add:
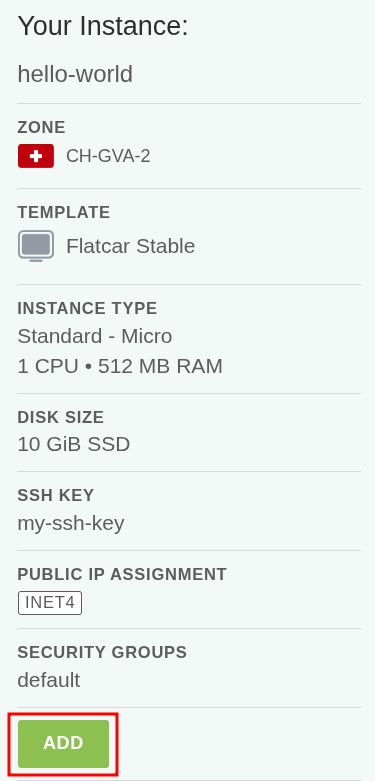
Create the instance with the CLI (omit --ssh-key if you did not register an SSH key in Exoscale, or omit --cloud-init if you skipped creating an Ignition configuration):
ZONE=ch-gva-2 # Must match the zone of the custom template

exo compute instance create hello-world \
  --zone "${ZONE}" \
  --template "Flatcar Stable" \
  --template-visibility private \
  --instance-type standard.micro \
  --disk-size 10 \
  --ssh-key my-ssh-key \
  --cloud-init config.ign
SSH to your instance
Once the instance is running, connect using the core user and the instance’s public IP address:
ssh core@<ip-address>
Using Flatcar Container Linux
Now that you have a machine booted it is time to play around. Check out the Flatcar Container Linux Quickstart guide or dig into more specific topics .